Monday, October 27, 2008

DC Bar Exam

No, not the law kind, the drinking kind. Information follows photos:
Old Europe
www.old-europe.com
2434 Wisconsin Ave NW
Washington, DC 20007
(202) 333-7600
My dad's favorite spot, and mine too (Octoberfest brew is DELICIOUS.)
Order: Oktoberfest & Schnitzel
Wear: Leiderhosen.

Granville Moore's
www.granvillemoores.com
1238 H St NE
Washington, DC 20002
(202) 399-2546
An old-style mussel shack on gentrifying H Street, NE. A converted barber shop. Just charming.
Order: Belgian beer & moules frites (don't miss the truffle aoli).
Wear: Your favorite hipster costume.

Russia House
www.russiahouselounge.com
1800 Connecticut Ave NW
Washington, DC 20009
(202) 234-9433
Can be a bit Euro for my taste, but for the most part, a fun escape.
Order: Vodka, clearly.
Wear: Fur.

Tuesday, October 21, 2008

tastespotting


It's time for me to eat some budget crunch, so no culinary masterworks are in the plans for this week. That doesn't mean a girl can't dream though, right? Check out the gorgeous culinary photography at my new favorite website, Tastespotting. Be warned: You'll get hungry.

Thanks, Shelby, for sending this my way.

Thursday, October 16, 2008

guest blogger: sarah!


Editor's note: Sarah was the reason this blog even exists. I'm so excited she was willing to guest blog her wonderful meal from last night! Without further ado, here's Sarah!

'Tis the season for squash... And for last night's debate, we wanted something warm and satisfying to keep out the first gusts of Nebraska's winter winds.

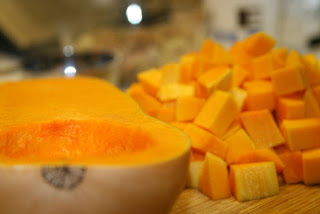
Topping everyone's list of go-to butternut squash recipes is usually soup. Butternut squash soup is certainly one of my favorite winter comfort foods (nothing beats my mom's), but I wanted to try something a bit more substantial. This dish combines sweet, creamy squash -- cubed and roasted to retain some structure -- with chicken seared with a dusting of ground sage and a decadent white wine sauce laced with nutty roasted garlic. It's not a quick meal, but take care of the unwieldy squash prep and tedious cheese grating in the morning and you can toss the dish together fairly quickly when you return at the end of a long day.

My girlfriends and I enjoyed this dish with a big loaf of soft Vienna bread torn into chucks and washed it down with big glasses of good Chardonnay. Take the extra garlic you roast with the squash and mash it with some softened butter for the bread.

Wint'ry Mix

Serves: 4-6
Prep Time: 30 minutes
Cook Time: 40 minutes

You'll Need:
  • 1 butternut squash (1 1/2 - 2 lbs)
  • 3 chicken breasts
  • 1 lb fettucine
  • 1 bulb garlic (yes, the whole bulb...you'll be glad you did!)
  • 1-2 cups fresh grated parmesan
  • 1 T. ground sage
  • 2 T. fresh sage
  • 1/4 C. flour
  • 6 T. butter
  • 3 T. olive oil
  • 1/2 C. dry white wine
  • 1/2 C. to 1 C. chicken stock
  • Salt and Pepper
Remove the tough outer skin of the squash with a sharp knife and cut the flesh into 1/2 in. cubes. Toss in a tablespoon of the olive oil and a generous amount of salt and pepper. Spread the squash evenly in a big baking dish. Slice off the top of the garlic bulb and drizzle with a touch of oil. Wrap the garlic in foil and nestle the packet amongst the squash cubes. Place the baking dish in a 350 degree oven. The squash will take 30 minutes or so to soften turn it once about halfway through. You'll have to leave the garlic in a bit longer...45 minutes to an hour. Just take the garlic out right as you're throwing everything together.

At some point (now is probably as good a time as any!), start the process of bringing your pasta water to a boil.

To prepare the chicken - Heat the remaining olive oil in a large, high-sided skillet over medium high heat. Dust each side of the chicken with a little ground sage and sprinkle with a generous amount of salt and pepper. Dredge the chicken lightly in flour and add to the pan. The flour will help form a lovely dark golden crust on the chicken and will help thicken the wine sauce when you deglaze the pan.

I cooked the chicken for about 6 minutes for each side, then turned the heat down to medium, put the lid on, and did another 4 minutes per side to ensure the chicken was cooked through. The result was plump, flavorful chicken that was tender and juicy inside and slightly crispy outside. Set the chicken aside to cool a bit and return your pan to the stove.

Now is a good time to add your pasta to the pasta water (which is hopefully now boiling). Don't forget to add a generous amount of salt to the pot.

Add a half a cup or so of wine to the pan and scrape up all the chicken bits in the pan. Let the wine reduce a bit, 3-5 minutes or so at a good simmer. Add the chicken stock and let the mixture cook down to a thin, but substantial sauce. When everything has reduced down add a tablespoon or two of the butter to give the sauce a rich depth and silky texture. At this point you can take the garlic out and carefully (I used a dish towel to avoid burning myself) squeeze out two or three cloves of the garlic into the sauce. Mash lightly with the back of your spoon and stir it in.

[Note: the following component can be omitted if you're really counting calories] In a small saucepan, melt the remaining butter (half a stick). Add the fresh sage and let the butter brown to a dark, caramel-colored sauce. This will be your brown butter drizzle.

Okay, time to toss everything together! Slice the chicken, find your squash, drain the pasta, and add everything back to the dry pasta pot. Add the parm, reserving a bit for topping, and toss with the pasta mix to melt and distribute. Pour the wine sauce over the mix and toss lightly once more. Plate the pasta, serve with a hunk of bread, and drizzle the plate with a bit of your butter mixture. Sprinkle with cheese and ENJOY!

*Image courtesy: www.krissa.org

Monday, October 13, 2008

gnocchi

In fourteen-hundred-and-ninety-two, Columbus sailed the ocean blue. And then he got lost, went to the Bahamas, and began to rampantly destroy indigenous cultures. Nonetheless, most states in the USA continue to celebrate this Monday holiday and the great (if storied) Italian, Cristoforo Columbo. I decided to use my Columbus Day to explore my own roots...

Several hundred years later, my fathers family immigrated to the United States from Italy. They did not get lost, but their last name did. That is why we are the Tringe family, not the Trinca family (God bless you, Zio Lorenzo). My father's family settled in the Northeast and, like many Italian families, carried on their strong family traditions from the old country.

One great memory I have of my Nonnie is of her making gnocchi at her kitchen table in Norwich, CT. She was fast. She had, what seemed to me, thousands of gnocchi in front of her. I remember trying to help, but having two left thumbs, mostly mutilated the dough (some help!).

Some years later, she hand wrote a cookbook for each of us grandkids. Nonnie, having dropped out of school at age 13 to go work in a factory, has remarkable handwriting and perfect spelling. She had grown up translating English to Italian for her non-fluent parents. The cookbooks she wrote for us are a treasure. So, here's to you, Nonnie, and all that you did for us and for helping us carry on our heritage.

Gnocchi, or, "Yonks," (according to Nonnie's cookbook):


RECIPE
Serves: 6
Prep time: Hours
Cook time: 2 minutes

You'll need:
4 lbs russet potatoes
5 egg yolks
1 C. - 2 C. semolina flour
2 t. salt
1 t. pepper

Bake the potatoes in a 350 oven for 1 hour and 15 minutes until done. Let cool for 30-45 minutes, then scoop the flesh into a potato ricer (discard the skins or fry them later). Rice the potatoes (alternatively, you can mash them well, but a ricer or a food mill is best). Add salt, pepper, egg yolks, and sift in 1/2 C. flour. Fold to mix (do not overmix). Add flour again. Fold to mix. Sift in more flour until dough is not delicate but not tough. (If mixture is too dry, add another yolk. If too wet, add more flour. This is an inexact science).

Divide your dough into four parts. Each 1/4 lump of dough will make two long "ropes." Roll the ropes into 1/2" to 3/4" width, then slice into 1" long pieces. (You will need more flour to prevent sticking as your roll, plus more flour to dust over the drying gnocchi). Dry on parchment-paper-lined baking sheets for at least 1/2 hour before cooking.

You can freeze gnocchi on baking sheet for 48 hours, then move them (still frozen) into a storage container. Should keep for up to 1 month.

To cook: Boil and salt a large pot of water. Gently add dumplings. Remove them when they float. Dress with sauce, and enjoy.

Classic Gnocchi Sauce: San Marzano tomatoes (crushed), fresh basil, fresh mozzarella. Salt to taste.

Sunday, October 12, 2008

juicy couture


West End Bistro by Eric Ripert
1190 22nd Street, NW
Washington, D.C. 20037
(202) 974-4900
All major credit cards accepted
Valet parking available at the Ritz Carlton ($8)
*Reservations recommended, or bar seating is available & a great option.

I know, I know, our economy just tanked. It's really not the best time to be dining at the Ritz Carlton, maybe. However, with a couple smart decisions with the menu, you can get in and out of there (with drinks!) for not much more than you'd pay for take-out. That's a good deal!

Chef Eric Ripert, the acclaimed 3-star Michelin chef at New York's Le Bernadin fame, opened the West End Bistro in DC with an emphasis on fresh, local ingredients and a menu that focuses on homestyle favorites like burgers, flatiron steaks, rustic pasta dishes, and hearty soups and stews.

We read some time ago that Ripert's Bistro offered the best burger in DC. Finally, last night, we decided to investigate. We both ordered beers ($5, chilly & poured just right in a frosty pilsner glass) the classic burger (a splurge at $18), skipped the appetizers, and ordered a very naughty side dish of macaroni ham & cheese for two ($10).

The burgers arrived, along with a bubbling cast iron mini-skillet of macaroni & cheese, about 20 minutes after we placed our order. While we waited, it was fun watching the West End Bistro crowd mill about on a Saturday night. All the typical characters were there: the attractive singles, older gentlemen browsing the crowd, and a few hipster-chic trust fund babies thrown in the mix.

But let's get back to the burgers. Thick and juicy and cooked just exactly right, the beef was decadent and beyond fresh. They're served with cheese on a buttered, toasted brioche bun with pickles, onions, tomatoes, mustard, and Boston Bibb lettuce. There is simply nothing wrong with it! The vegetables have been sliced paper thin, so you get all the flavor with none of the bulk.

We really had no business ordering macaroni and cheese alongside the burger, but I simply can never turn the stuff down, especially when the recipe comes from a 3-star Michelin chef. And I was glad we didn't turn it down: the al-dente elbows were creamy and cheesy, and the bits of ham throughout were downright decadent. The buttered breadcrumb top was bubbly and crispy and browned, and in a word: perfect.

We were more or less incapacitated after this doozy of a meal, but both of us agreed that it was a worthwhile splurge. By ordering beer and steering clear of the pricier menu selections (which I'm sure are completely incredible), and sticking with the known masterworks, we got away with a $60 tab. A worthwhile splurge indeed. We'll be back for more.

Wednesday, October 08, 2008

party animal

'Tis the season for swing states, absentee ballots, and of course, DEBATES! Last night we invited a few friends over for some friendly sparring during the most recent presidential debate. We planned a very fun (and we thought, funny) menu to go along with the show. Whether you're a McCainiac or you just can't get enough of Obama, you'll enjoy these treats. Here's what we ate:

"Nope-it-ain't-Moose-Burger!" Sirloin Sliders
A very easy and fun way to eat burgers. Two pounds of ground sirloin should make about 20 sliders. Top with cheese, bacon, lettuce, tomato, onion, mustard and ketchup.

Iceberg "Wedge Issue" Salad
Chop up a head up iceberg lettuce and mix with bacon crumbles, blue cheese crumbles, tomatoes, and a light dressing of balsamic vinaigrette. Easy!

"Okie-Dokie-Artichokie!" Spread
Mix two cups of chopped canned artichoke hearts with 1/2 c. sour cream, 1/2 c. cream cheese, and 1/2 c. mayonnaise, 1/2 c. grated parmesan. Stir in 1 c. fresh chopped spinach. Crack plenty of black pepper, stir to combine, top with more grated parmesan and bake in a 350 oven until bubbly. Serve with Red, White & Blue Tortilla Chips.

"Can't-We-All-Just-Get Along?" Red & Blue Mixed Berry Crumble

(Thanks, Caitlin!)

Berry filling:

3 C or more fresh or frozen (thawed, drained) blueberries
3 C or more fresh or frozen (thawed, drained) raspberries
3T white sugar
3T all-purpose flour
1 t cinnamon (if desired)

Crisp topping:

1 1/4 C all-purpose flour
1 1/4 C old-fashioned oats
3/4 C packed brown sugar
1 stick butter
1 t cinnamon
1 t nutmeg

1) Preheat oven to 350 degrees. Place berries in 9" pie or square glass baking dish. (Berry layer should be between 1.5 to 2" thick, or 3/4 the way up the side of the pan.)

2) Sprinkle berries with 3T flour, 3T white sugar, and 1t cinnamon. Gently fold dry ingredients into the berries until moistened and evenly distributed. Smooth surface of berry layer.

3) In a large mixing bowl, combine flour, oats, brown sugar, cinnamon and nutmeg.

4) Cut chilled butter into 8-10 chunks and drop into dry ingredients. Use either a pastry cutter, two forks, or your hands to fully combine all ingredients until butter is evenly distributed throughout dry ingredients, and the mixture is slightly moist and crumbly.

5) Sprinkle crumbly topping evenly over berries.

6) Place into the oven. Bake for 30-40 minutes, until top is golden brown and berry juice is bubbling through. Cool for 20-30 minutes. Serve warm with homemade whipped cream.

We enjoyed snacking throughout the debate, and will definitely plan to do it again. Perhaps a Maverick cocktail is in the works? Or maybe a Baked Alaska? Lots of other great debate party food ideas can be found here.

*graphic courtesy of lexlibertas.com

Monday, October 06, 2008

the far east in northwest DC: shanghai teahouse


Shanghai Tea House
2400 Wisconsin Avenue
(202) 338-3815
Accepts credit cards: Yes
Price Range: $$ (out of 4)

After I read this review by Tom Sietsema in the Washington Post, I knew this was a place I could get excited about. We visited Shanghai Teahouse in Glover Park around 7 last Friday night. The restaurant is on the small side, and service is dicey at best (think: confused waitresses, uninformed kitchen staff, and long waits for getting water and your check), but the food is awesome and affordable. I can forgive the rest!

Thanks to Tom Sietsema's advice we knew to skip the General Tso's Chicken and dine on dumplings instead. We ordered hot an sour soup (one word: intense.), an order of boiled lamb dumplings, an order of boiled vegetable dumplings, and an order of pan fried vegetable dumplings, as well as some spring rolls and scallion pancakes.

The boiled vegetable dumplings were the star of the night. The dough was delightfully chewy, and the filling was gratutiously garlicky (perfect!). The pan-fried version of the same dish were just average. The lamb dumplings were a real treat - the lamb was prepared perfectly (very lean and tender) and paired with tangy ginger, cabbage, and carrot. Oh, yum!

The scallion pancakes were delicious, but then, I've long been a fan of this oily, savory bread treat and, for me, they can do no wrong. The menu does have something for everyone in case you are a person who does not enjoy dumplings or scallion pancakes, and bonus: all their food is completely MSG free.

Their tea menu is long and wide with great descriptions for each. As with the food menu, I took my cues from Sietsema's review and ordered the snow pine tea. As I sipped it from my tiny, thermal, double-glass teacup, its fragrance wafted up to me like a delicate perfume. It was the perfect digestive as we ate platesfull of dumplings. I liked it so much, I may (maybe, maybe) forego my usual glass of wine with my next big meal!

Do go, forewarned about the service. Stick to the dumpling menu, and be adventurous with the tea selections. Enjoy your trip to the far east in Northwest DC!

Monday, September 29, 2008

chicken paillard


In spite of it's recent political reputation, I encourage you to go ahead and drink your wine, and eat your arugula, and try out a great French classic, elitism be damned! Everyone from Rachel Ray to Julia Child (great equalizers, both) have favored this quick, light meal, so I thought I'd give it a try last week. It was fantastic!

Paillard (Pie-YARD) just means "a thin cut of meat that is cooked quickly." You can use chicken or veal for this, and if your cuts aren't thin already, you can pound them thin fairly quickly with a big mallet, a heavy (non-glass) jar, a frying pan, or a rolling pin. The ingredients and method that follow are the ones that I used and recommend, but I'm sure there are lots and lots of great variations. Leave your suggestions in the comments! I really liked this recipe, which I adapted from Tyler Florence's "Ultimate Chicken Paillard" on http://www.foodnetwork.com/. The lightly flavored chicken has a deliciously crispy coating, and it pairs well with assertive, peppery arugula and a tangy lemon vinaigrette. The parmesan shavings round out the flavors with robust nuttiness.

Chicken Paillard
Serves: 4
Prep time: 20 minutes (1o minutes active, 10 minutes inactive)
Cook time: 10 minutes

You'll need:
4 chicken breasts
2 C. panko bread crumbs
1 C. flour
2 eggs, beaten well
1/2 C. olive oil (1/4 C. for vinaigrette, 1/4 C. for cooking)
1 bag baby arugula
1 5-oz wedge parmesan cheese
2-3 lemons
Salt & Pepper

First, place your chicken breasts between two layers of plastic wrap OR one-at-a-time into a large freezer bag (will make pounding less messy). Pound out to an even thickness, about 1/3 in. thick. (If you use good-sized chicken breasts, the end product may be as large as a small dinner plate.) Pound well, but be careful not to over-pound, or your chicken will fall apart.

Next, assemble your "breading station" thusly with three separate bowls: 1 bowl with flour, salt, and pepper (1 t. each), 1 bowl with your beaten eggs, and 1 bowl with your panko and 1/4 C. grated parmesan, salt, and pepper (again 1 t. each). First flour the breasts, then dip in egg, then coat well with panko. IMPORTANT: Let the breading "set" by placing paillards on a baking sheet in the fridge for ten minutes. This will help the breading not to fall off when you saute it. Repeat for each chicken breast.

When your paillards are chilling in the refrigerator, make the vinaigrette (but don't toss with arugula until the last minute). Whisk together juice from 1 lemon, plus 1/4 C. extra virgin olive oil, plus 1 t. salt and 1 t. pepper). Set aside.

To cook the paillard, heat 1/4 C. olive oil on medium heat in a large frying pan. Gently place your paillard in the pan, working in batches if necessary (this dish does not need to be served piping hot, is completely delicious warm or room temperature). Let it cook uncovered and undisturbed for two to three minutes per side, then turn. These cook quickly, but it's also important to let the breading get nice and golden.

When you're ready to serve, toss the arugula greens with the vinaigrette. Place one chicken paillard on a plate, and top with greens. Garnish with parmesan shavings and lemon wedges.

Wine, anyone?

Since this is a light, chicken dish, I'd pair this with a nice bright Sauvignon Blanc or Sancerre. Both have nice citrus notes which will complement the lemon.

Tuesday, September 23, 2008

herbal renewal

Back in the cold, dark days of college, I used to really enjoy getting dinner at a place called Bhindi Bazaar at 95 Massachusetts Avenue in Boston. One of the things I loved to eat there was the awesomely tangy and spicy chicken cafreal, which is a Goan dish of chicken bathed in a green, cilantro-based curry. I have agonized about not being able to find cafreal on many restaurants' menus, and when I do, would it be the same? Imagine my delight when, last night, I found a recipe online claiming to be Bhindi Bazaar's recipe for chicken cafreal. Joy! I decided to follow it verbatim to test the results...and the verdict is: pretty, pretty, pretty good. There are a couple of things I will tweak next time to make it better, but this recipe will be a staple in our files from now on (my adjustments included in recipe below).

A quick bit of information, in case you wanted some: this recipe uses cilantro and turmeric. Both are known anti-inflammatory agents. I read somewhere, too, that cilantro has antibacterial powers. So, eat up!

Chicken Cafreal
Serves: 4
Cook time: 20 minutes
Prep time: 20 minutes

You'll need:
1.5 lbs. chicken breasts, diced to 1 inch pieces
2 onions, diced
2 tomatoes, peeled and chopped
1 large bunch of fresh cilantro
4 garlic cloves
2 C. fat free greek style yogurt
1 t. turmeric
3 t. ground coriander
1 t. ground cumin
1 lemon, juiced
2 limes, juiced
5 T. olive oil
4 green chiles (jalapenos) de-stemmed and de-seeded, roughly chopped
1 inch ginger, peeled and chopped or grated
Salt

Part 1: The Chicken
Dice the chicken into one inch cubes. Measure 1/2 C. greek style fat free yogurt into a bowl, and add 1 t. turmeric. Salt, and stir well with a fork to combine. Toss in chicken, turn to coat, and refrigerate for 30 minutes to marinate.

Part 2: The Tomato and Onion Base
Peel and dice your onions, and sautee them with 3 T. olive oil over medium heat for a few minutes until they are translucent. Peel your garlic and either chop or crush it into the pan with the onions. Next, chop your peeled tomatoes and add them to the pan. Stir, then add 3 t. coriander and 1 t. cumin, plus 1 t. salt, plus your ginger. Sautee for an additional 5 minutes, until onions are translucent and mixture is fragrant. Turn off heat and allow to cool for 10 minutes. Place in food processor or blender and mix on high for 1 minute until completely paste-like.

Part 3: The Green Curry
Roughly tear or chop the entire bunch of rinsed cilantro, and put it in your food processor or blender. Add the juice from the lemon and limes, plus the 4 green chiles (I used jalapenos, de-seeded). Add 2 T. olive oil, and blend or process on high speed for 1 minute or more until mixture is completely paste-like.

All together now:
In a deep skillet, add the onion and tomato base, and turn heat on low. Remove your chicken from the fridge, and place into onion and tomato base. Stir to combine, then cover and let simmer with the LID ON for 15-20 minutes. Occasionally lift lid and stir chicken. Meanwhile, add 1 C. yogurt to your green curry mixture, and stir well to combine. When chicken is cooked through, take skillet off heat. Add green curry and yogurt mixture, and stir until heated through. Taste, and adjust seasonings before serving.

Serve over cooked white basmati rice, with a tall, cold Kingfisher beer.

Monday, September 15, 2008

retro feast

Have you been watching AMC's latest and greatest, Mad Men? If not, you should. It's a show about a group of Advertising Executives working on Madison Avenue in the 1960's. They called themselves the "Mad Men." The producers make every effort to capture and re-create the essence of the sixties, from the music to the products to the fashion (oh, the fashion!), right down to what these folks order in restaurants (Oysters Rockefeller. Gin Martinis. Ceaser salad. Steak Tartar.). Last night, I was inspired to create a little retro feast while we watched our favorite show. On the menu? Meatloaf and gravy, mashed potatoes, asparagus, and red wine. Mad Men airs on AMC at 10 p.m. EST on Sundays.

Betty Draper's No Salt Meatloaf
Serves: 6
Prep time: 20 minutes
Cook time: 55 minutes

You'll need:
1 onion
2 cloves garlic
1 green bell pepper
1 lb. gound beef
1 lb. ground veal
1 C. ketchup, divided (1/2 C. goes in the mix, the other 1/2 C. goes on top, later)
1/4 C. tomato paste
1 egg
1 C. bread crumbs
1 t. dried thyme
1 t. dried oregano
1 t. ground pepper
1 T. olive oil

First, preheat your oven to 400 degrees. Next, chop your garlic, onion and bell pepper in a fine dice, and sautee in olive oil for 20 minutes or until beginning to brown. While your vegetables are browning, measure the rest of your ingredients into a large mixing bowl. Mix your meat, breadcrumbs, herbs, egg, and tomato products until combined. Add the vegetables and stir to incorporate. Put in a loaf pan, top with remaining ketchup, and bake for 50-55 minutes.

You-don't-want-to-know-what's-in-these Mashed Potatoes
Serves: 6
Prep time: 5 minutes
Cook time: 40 minutes

You'll need:
2.5 lbs. potatoes (your favorite kind, I use white organic)
3 T. butter
1/2 to 1 C. whole milk
1 C. sour cream
3 oz. cream cheese
2 cloves garlic
1 T. salt
1 t. ground pepper

First, scrub your potatoes well. Chop them into quarters, then drop them into a large pot of cold water. Cover, and turn the pot on high heat. The potatoes should be fork tender in about 30 minutes. Drain the water from the potatoes, and crush two garlic cloves in with the hot potatoes. Cover, let stand for 5 minutes. Gradually add the other ingredients while smashing potatoes with a wooden spoon or a potato masher. Adjust seasoning and milk to taste.

Good Gravy
Prep time: N/A
Cook time: 10 minutes

You'll need:
2 C. beef stock
1 T. butter
1 T. flour
1 T. corn starch whisked with 1 T. water (slurry)
Plenty of cracked black pepper

First, melt butter. Next, whisk in flour. When paste turns golden, add beef stock, gradually, whisking to remove lumps. When you have added all your beef stock, let simmer over low heat until it begins to thicken. If not thick enough, gradually add some cornstarch slurry, whisking well to ensure it's smooth. Crack plenty of black pepper, whisk to combine, and serve over meatloaf.

Green-with-envy Asparagus
Serves: 6
Prep time: 2 minutes
Cook time: 20 minutes

You'll need:

1-2 bunches fresh asparagus
2 T. olive oil
Salt & Pepper

First, spend a couple minutes rinsing your asparagus in cold water, and snapping off the woody ends. Next, lay them in a single layer on a baking sheet with edges, and drizzle 2 T. olive oil over the stalks. Sprinkle with salt and pepper, and roll them around a bit to ensure even oil coverage. Pop the stalks in a 400 degree oven for 20 minutes. Serve hot, on the side.

Don't forget your favorite bottle of red wine. I'm not sure, but I get the feeling that Betty Draper is a Pinot Noir kind of girl.

Thursday, September 11, 2008

ratatouille (rat-ta-too-ee!)

Save for once back on Capitol Hill after too much scotch on a chilly day...I haven't had homemade ratatouille. America re-discovered the joys of this hearty stew thanks to the magic of Pixar, and last night, I decided to give it a go. Having eaten it enough times in various restaurants (a good vegetarian standby), I knew enough to taste the difference between ratatouille the right way, and ratatouille the lazy way. A good ratatouille highlights the best flavor from each vegetable, and blends them using herbal under and overtones.

Ratatouille
Serves: 4
Prep time: 20 minutes
Cook time: 1 hour

You'll need:
Olive oil
1 Onion
5 cloves garlic
1 medium/large eggplant
2 zucchini
1 yellow squash
1/2 28 oz. can peeled whole tomatoes
1 t. fresh Thyme
1 T./10 leaves Basil
1 t. Dried Oregano
Salt & Pepper
Jarred or homemade Pesto (I like Torino brand)
Goat Cheese (5 oz.)

First, wash all of your vegetables. Peel the onion and the garlic. Preheat oven to 400 degrees. Dice your eggplant into 1-inch cubes, then toss eggplant with 1 T. salt, and put in a strainer over a bowl for at least 30 minutes. (The salt helps the eggplant lose moisture so it will brown more readily/evenly when you roast it).

Next, chop your onion and your garlic. Heat 2 T. olive oil in a large pot over medium/high heat, and add your chopped onion and garlic. Let these brown for about 10 minutes. Meanwhile, cut your zucchini and your squash in 1 cm. cubes. When your onions are brown, add the squash and zucchini.

Brown your zucchini and squash with the onions. This should take another 15 minutes, then you should take your pot off the heat before the vegetables become mushy.

Returning to your eggplant, press down on it firmly to get as much moisture as possible out of the pieces. Quickly rinse under cold water, and squeeze again to dry. Spread them in a single layer on a baking sheet with edges, and continue to pat dry with a paper towel or a kitchen towel. Next, drizzle with a liberal amount (3 T.) olive oil and toss until evenly coated. Finally, put in oven for a total of 30-35 minutes, turning once to roast.

When your eggplant chunks are getting near-done, return your attention to your pot of onions, zucchini, and squash. Return pot to medium-high heat, and stir, adding 1 T. olive oil to coat vegetables. Add 1 t. chopped thyme, 1 T. chopped basil, and 1 t. dry oregano, stir to combine.

Open your can of tomatoes, and add 4-5 tomatoes to the pot, along with some of the canning liquid. Break them up with your wooden spoon, and salt to taste. Your pot should look more stew-like now.

When your eggplant chunks are browed, remove them from the oven and add them to the stew pot. Stir to combine all ingredients, and let it continue to cook for an additional 5 minutes. By using separate cooking processes for the vegetables, you ensure that you get the best flavor from each vegetable.

To serve: Put 1 T. pesto in the bottom of each dish, and spread it around to coat the bottom of the dish. Place 2 C. ratatouille in each bowl. Add another T. pesto on top, plus 1-2 T. goat cheese. Serve with a rustically torn piece of french baguette, and a big glass of your favorite red wine. Bon apetit!

The pesto, though not traditional, highlights all the herbal notes from the ratatouille and adds a deep earthy, nutty undertone - it really is the perfect complement. I won't eat ratatouille without it!

Friday, September 05, 2008

tangeringe beef

My go-to dish at Chinese restaurants has always been orange peel beef. Last night was my first attempt at re-creating the magic at home - and I found out that not only is it surprisingly easy (near foolproof), it's almost a dead-ringer for any restaurant dish.

The recipe I ended up with is adapted from Food Network's Guy Fieri's files - I like his style in the kitchen - adventurous, but not pretentious. So, I encourage you to try it out, I don't think you'll be disappointed!

Tangerine Beef

Prep time: 30 minutes
Cook time: 20 minutes

You'll need:
1.5 lbs. flank steak
4 T. soy sauce (I used Tamari, I like the deep flavor)
1 T. corn starch

Sauce:
2 T. soy sauce (again, Tamari is good)
2 T. hoisin sauce
2 T. olive oil
2 T. honey
2 T. dry sherry
1 T. hot chili paste
1 clove garlic, crushed
1 T. ground ginger
1/4 C. fresh squeezed tangerine juice
1/2 t. tangerine zest

Garnish:
3 Scallions - chopped

For the meat marinade: Whisk together soy sauce and corn starch. Slice flank steak across the grain/on the bias into very thin slices. Toss flank steak with soy sauce/corn starch, and let marinate in fridge for at least 20 minutes.

For the sauce: Whisk together all the ingredients and set aside.

To cook the beef: Heat 2 T. oil in a deep skillet for 2 minutes, until it's very hot. First, sautee the beef. once you put it in the pan, let it sear for at least one minute and up to two before tossing. (Tongs are helpful when working with strips of beef). When you are happy with the level of caramelization on the beef, give the sauce a quick stir and add it to the sautee pan. Sautee until sauce reduces slightly, or until you are happy with the done-ness of your beef. And that's it!

I served this last night with whole grain rice, as well as a very simple, colorful salad of red cabbage and shredded carrot, tossed in Ken's Lite Asian Ginger Sesame dressing - delicious, and healthy.

For the salad, either finely chop or use a mandolin to slice half a head of red cabbage into a deep bowl. Toss with shredded carrots (you can buy carrots pre-shredded at the store, or do it yourself using a cheese grater at home). Toss with 1/4 C. Ken's dressing - and chill for 30 minutes.

Tuesday, August 12, 2008

restaurant week: dc


Washingtonians, unite! It's that time of the year: the dog days of summer, recess, and most importantly, restaurant week. There's still time to make your reservations for a table in any of the participating restaurants to enjoy a three-course meal for just $35 per person. (Lunch reservations will run you a cheery $20.08).

My handsome date and I enjoyed a table for two at Georgetown's charming Mendocino Grille last night (Sister restaurant on the Hill is swanky Sonoma). I enjoyed the bibb lettuce salad, the grilled heart of palm on a bed of ratatouille and rapini pesto, and the coconut and lemongrass sorbet. Service was good, restaurant was happily abuzz but not too crowded. Food was delicious!

A few personal thoughts on restaurant week: It's liberating to be able to go to any of the participating restauarants and know that you will be eating three courses and not paying more than $35. But - if you're like me, sometimes you want appetizers and salad, or salad and an entree, or any combination of courses as your meal. RW imposes different rules on you, like eating dessert (something I rarely choose to do at a restaurant), or appetizer or salad (but not both). It can also work out that the restaurant will tack on surcharges for some "premium" menu items. In that case, it can happen that ordering from the pre-fixe restaurant week menu will run you more than just ordering off the menu a la carte. Just something to consider when making your reservations and your menu selections!

Another thing to consider is whether or not you'll want wine with dinner (I did). I had a single glass, at $9. Somehow - our bill ended up at $118.00. Not quite the restaurant week bargain we'd hoped for, but a really lovely meal nonetheless.

SO, with that cautionary tale - go forth and enjoy your reservations.

Friday, August 01, 2008

ginned up


Lemony Snicket*
Makes: 1
Prep time: 1 minute
Cook time: n/a

You'll need:

-Bombay Sapphire
-Pellegrino Limonata (carbonated lemon water)
-Ice

Pour one to two shots of gin over ice. Add half a can of San Pellegrino Limonata. Stir gently. Enjoy! Perfect for the hot, dog days of summer.

*Named for Stef's favorite movie. Enjoy slowly to ensure there are no unfortunate events following.

Monday, July 28, 2008

sage advice

This summertime winner is adapted from my very favorite summertime cookbook, "How to Grill," by Steven Raichlen. If you don't have a copy, and if you like to grill, go pick one up for about $15 on Amazon.com. You won't regret it, and you'll learn a lot.

Grilled, Stuffed Pork Chops with Sage
Serves: 6
Prep time: 15 minutes
Grill time: 14 minutes

You'll need:
  • 6 boneless pork chops

  • 12 fresh sage leaves

  • 4 oz. Prosciutto

  • 6 oz. Fontina cheese

  • 1/4 c. olive oil

  • Salt & Pepper

  • toothpicks (soaked in 1 T. olive oil)

First, prepare your pork chops by using a paring knife to cut a big, deep pocket in the pork chop. (As big as you can cut without slicing the chop in two). Next prepare your fontina by cutting it into pieces that are about the size of your pinky. Wrap the fontina in a piece of prosciutto, then take the prosciutto-wrapped fontina and stuff it inside the pork chop pocket. To close the chop, secure the open seam with two to three olive-oil-soaked toothpicks (olive oil helps the toothpicks not to burn up on the grill). Next, brush both sides of each chop with a generous amount of olive oil, and season with plenty of salt and pepper. Lastly, press 1 sage leaf onto each side of each chop. The fire from the grill will create a wonderful flavor and aroma in your chop.

To cook: Heat your grill on medium heat for five minutes with the lid on. Place your chop on the grill for 6-7 minutes per side. (If you want gorgeous grill lines, place your meat at a 10 o'clock angle for 3 minutes, then rotate to a 2 o'clock angle for three minutes each side).

The cheese and prosciutto help this chop to be flavored well and not-too-dry. If you think the pork wants a sauce, and think you could get away with something as decadent as sage butter during swimsuit season, by all means, sauce on! (Sage butter: 6 T. butter, melt in a saucepan over low heat until beginning to brown, add 5 sage leaves to butter for 1 minute, stirring constantly, remove from heat as soon as brown color deepens to tan).
Serve with: A crisp sauvignon blanc, a salad of mixed greens and a lemony dressing, and all of your favorite people.

Wednesday, July 09, 2008

see you tamari


Tamari is a Japanese soy-sauce. It's got a cleaner flavor than regular soy sauce, and had a starring role in last night's dinner. Here's a great recipe for teriyaki chicken bowls - using Tamari to make your own teriyaki!

Teriyaki Chicken Bowls
Prep time: 30 minutes
Cook time: 45 minutes

For the rice bowls, you'll need:

1 C. whole grain brown rice
1 head napa cabbage
1 white onion
1 lb. chicken (boneless, skinless breasts)
1 C. teriyaki sauce *recipe below
2 T. tamari
1 t. chili paste
3 T. olive oil

First, make the teriyaki sauce (~15 mins). Measure 1/2 to 2/3 C. in a plastic bag, and marinate your chicken for 20-30 minutes.

While your teriyaki sauce is coming to a bubble, make rice according to package directions. If you're using whole grain rice, which is far superior to his pasty brother white rice in both flavor and nutrition, the cooking process should take about 45 minutes.

Next, slice your onion, and set it aside. Then, shred the entire head of napa cabbage. Heat 3 T. olive oil in a large pot (pasta pot works well), and add the onion. Stir the onion until beginning to brown, then add the cabbage, plus 1/2 C. water, and cover for 5 minutes. Add 2 T. tamari plus 1 t. chili paste and stir to combine. Continue cooking on medium heat, until done to your likeness (can be very crispy, or very wilted - whatever you like).

When your chicken is done marinating, heat your grill/pan, and cook the chicken. Use 1/2 C. teriyaki sauce to baste while cooking, turning every 3 minutes or so for 15-20 minutes, depending on the size of your chicken and the heat of your grill/stove. When your chicken is done cooking, take it off the heat and let it rest for a few minutes, then slice it into very thin slices accross the grain.

To assemble your rice bowl: Measure 2/3 C. cooked rice in the bottom of the bowl. Next, add two tong-fulls of cabbage and onions on top. Next, add some sliced chicken. Top with a small ladle-full of teriyaki sauce, plus hot sauce to taste. Enjoy!

For the teriyaki sauce, you'll need:

1/2 to 2/3 C. tamari
1 1/2 C. water
4 T. brown sugar
3 cloves very finely diced garlic
1 T. ground ginger
1/2 C. water plus 2 T. corn starch, well mixed, to be added at the very end*

In a small saucepan, combine your tamari, water, brown sugar, garlic, and ginger. Whisk well over low heat, until sauce bubbles. Continue to whisk for 10 minutes, then add the corn starch slurry, and whisk well until thickened. (If too thick, add more water or tamari).

Note: This recipe yields +/- 2 C. sauce. You'll need 1 cup for marinade and 1 cup for topping, so divide it into two parts when it's done cooking.

For a tasty dessert:
Grilled Pineapple Rings

Take one whole pineapple, cut the top off. Then, cut the bottom off. Then, cut off the spiky sides, 1 strip at atime. Next, cut your pineapple into 1/2 inch slices. Use a biscuit cutter (or a knife) to remove the woody center. Grill on medium heat for 3 minutes per side. Enjoy!

Wednesday, July 02, 2008

hot dog!


We've all been there - standing in front of no less than 20 different kinds of hot dogs before a BBQ. You want to buy the ones that will taste the best. Or should you get vegetarian hot dogs? But what do those taste like? Nathan's? Hebrew National? Oscar Mayer? The options are many, and dizzying.

Just in time for the 4th of July, we've got some answers! Ben and I took a recent Saturday afternoon to execute a blind hot dog taste test. We got the idea after we watched a sort of historical documentary piece about hot dogs/frankfurters/wieners on the History Channel. We grilled each of the hotdogs until they were an even done-ness, put them in a toasted whole wheat bun, and each got a stripe of mustard. Add a blindfold, a makeshift ratings system, and here you go:

Here's how the ratings worked:

5: Highest, ideal.
4: Pretty good; not perfect, but pretty, pretty, pretty good.
3: Take it or leave it.
2: I guess I'd eat this if someone made me
1: I never want to eat that again.

We tasted all the dogs in the photo, here's how they ranked:
Oscar Mayer
Rating: 3.5
You know the song. I won't sing it. In the blind test, these dogs stood up as a pretty decent standard. They were really salty, which I think is something most people crave when they think of a hot dog.

Nathan's All-Beef Franks
Rating: 5
Great hot dog - they were seasoned really well, and the grill charring was a complement to the overall flavor. I'd recommend these to any griller. From the first bite, this was the standout dog in the crowd.

Tofu Pups
Rating: 1.5
First, to be fair, these probably are not meant to be grilled. When I was grilling it, it cooked about as well as a plastic bag would. The yellow-ish color was a little off-putting as well. The consistency of these were pretty gross, with tofu being a prominent flavor. I expected to really like these, but couldn't bear more than a couple bites.

Smart Dogs
Rating: 2
If you had to grill a veggie dog, make it a Smart Dog. It won't taste like meat, but it won't taste like tofu, either, which is important. These were seasoned well and stood up to the grill a little better than the tofu pups.

Ben's and my scores were averaged.
We know it wasn't the most comprehensive taste test, but given that there were only two of us...we felt like we got a pretty good grasp on the standards. Stay tuned for more taste tests of your favorite junk food. Any suggestions?

Tuesday, July 01, 2008

tomato soup


Chalk this one up to being another San Marzano miracle, but this was some great soup! 

Tomato soup:
Prep time: 5 minutes
Cook time: 15 minutes
Serves: 4

You'll need:
  • 1 - 28 ounce tin San Marzano stewed tomatoes
  • 1 jar roasted red peppers (10-12 oz.)
  • 6 leaves basil
  • 4 cloves garlic
  • 2 T. olive oil
  • 1 and 1/2 t. salt
  • 1/2 t. red pepper flakes
Special equipment: blender.

First, peel and finely chop the garlic. Next, heat your 2 T. olive oil in a medium-sized saucepan over medium heat. Add the garlic and stir until golden. Add your red pepper flakes and cook for another minute. Next, add the stewed San Marzano tomatoes - use your spoon to break them up a bit. Then, tear the basil into the pot, and stir. Last but not least, season with salt. Cover, and let simmer for 10 minutes. 

To puree the soup, use your blender. Pour the soup (can still be hot) into the blender - but either leave one corner of the lid up, or take out the plastic center part - and cover with a double layer kitchen towel (if you don't you'll create a tomato explosion inside your blender by emulsifying hot liquids in a small space--trust, don't do this!). Blend on low speed for 1 minute. Pour back into your saucepan and heat over a low flame before serving.

To serve: Ladle tomato soup into bowls. Top with a crouton, a curl of parmesan cheese, and a basil leaf. Enjoy, enjoy, enjoy! 

Monday, June 23, 2008

secret sauce


Here's one to pack away in the "family secrets" recipe file. A simple tomato sauce perfect for really, just about anything. Since there are so few ingredients - it's important that you use a really good quality everything, most importantly, the tomatoes. I use San Marzano tomatoes...if you've never heard of them, here's what Wikipedia has to say:

"The story goes that the first seed of the San Marzano tomato came to Campania in 1770, as a gift from the Kingdom of Peru to the Kingdom of Naples, and that it was planted in the area that corresponds to the present commune of San Marzano. They come from a small town of the same name near Naples, Italy, and were first grown in volcanic soil in the shadow of Mount Vesuvius. The volcanic soil is believed to act as a filter for water impurities. Compared to the Roma Tomatoes with which most people are familiar, Marzano tomatoes are thinner and pointier in shape. The flesh is much thicker with fewer seeds, and the taste is much stronger, more sweet, and less acidic."

...So, there you have it (the story anyway). Here's the recipe:

Tomato Sauce
Serves: 1 lb. of pasta
Prep time: 10 minutes
Cook time: 15 minutes
You'll need:
  • Extra Virgin Olive Oil
  • Garlic Cloves (3)
  • Basil Leaves (6-10)
  • One 28 oz. tin San Marzano tomatoes, peeled, whole
  • 4 T. butter
Special equipment:
  • 2 saucepans
  • 1 strainer
  • wooden spoon
First, slice the garlic cloves. Then heat 1/2 C. olive oil over medium heat for 1 minute. Add garlic cloves. When garlic is blonde, add the basil leaves and cover immediately (will splatter). Let the basil fry for another 2 minutes while you open the can of tomatoes. When you are ready to add the tomatoes to the saucepan with the olive oil and garlic, take the pan off the heat. Break the tomatoes up a bit in the pan, cover, replace pan over a low flame for another 5-10 minutes. The next step is straining the sauce. Put your strainer over a clean saucepan, and pour sauce into strainer. Use your spoon to push the sauce through the strainer. Get as much sauce as you can through, but don't feel bad if you have lots of solids left (I had almost 3/4 C. basil leaves, garlic, and tomato stems). Put the strained sauce back on the stove, over a low flame. Stir, season with salt to taste (probably 1t. to 2t.). Next, cube the 4 T. butter, and add them to the sauce. Stir until smooth.

The secret, aside from the tomatoes of course, is the butter. By infusing the sweet tomatoes with basil, olive oil, and garlic flavors, then straining it and and adding butter - you get a wonderfully rich sauce that is perfectly smooth. This thin sauce is perfect for long pasta, like angel hair. Don't forget fresh grated parmiggiano over the top of your pasta and sauce, and a nice Chianti.

Saturday, June 21, 2008

georgetown cupcake


Sprinkles, I think, is to blame/credit for the nationwide cupcake bonanza that's piqued the interest of even the tiniest sweet tooth.  Today, I visited one of the two cupcakeries that have gained a wide-reaching fan base in Washington, D.C. 

Georgetown Cupcake
1209 Potomac Street
Washington, D.C. 20007

This tiny outpost, located adjacent from the Shops at Georgetown (across the street from Dean & DeLuca on M) draws admirers from far and wide for their tiny confections. At $2.75 a pop, it's a splurge, but one bite into their lemon berry cake and you'll know it's worth it. They serve about a dozen flavors every day, plus chocolate and vanilla. I got a half-dozen of these in mocha, lemon berry, vanilla squared, chocolate banana, and chocolate mint. I polished off the lemon berry buttercream in no time flat - I can't wait to try the rest! (Photo is of Georgetown Cupcake's finest). 

Cake Love
1506 U Street, NW
Washington, D.C. 20009
(202) 588-7100 

Lawyer-turned-baker Warren Brown started his empire with this store in the late 1990's. His cakes and confections won him the favor of an untold number of Washingtonians, not to mention a new national fan base thanks to his show on the Food Network, "Sugar Rush." If you don't have a sweet tooth yourself, this is the perfect spot to buy a box of four as a thank-you to someone who was nice to you!